The Build form can be triggered from a number of different screens in the portal. The most common way is from the Build screen. See Building Compute - Navigation for details. You will be redirected to a form with customisation options.
Required Fields are indicated with a *.
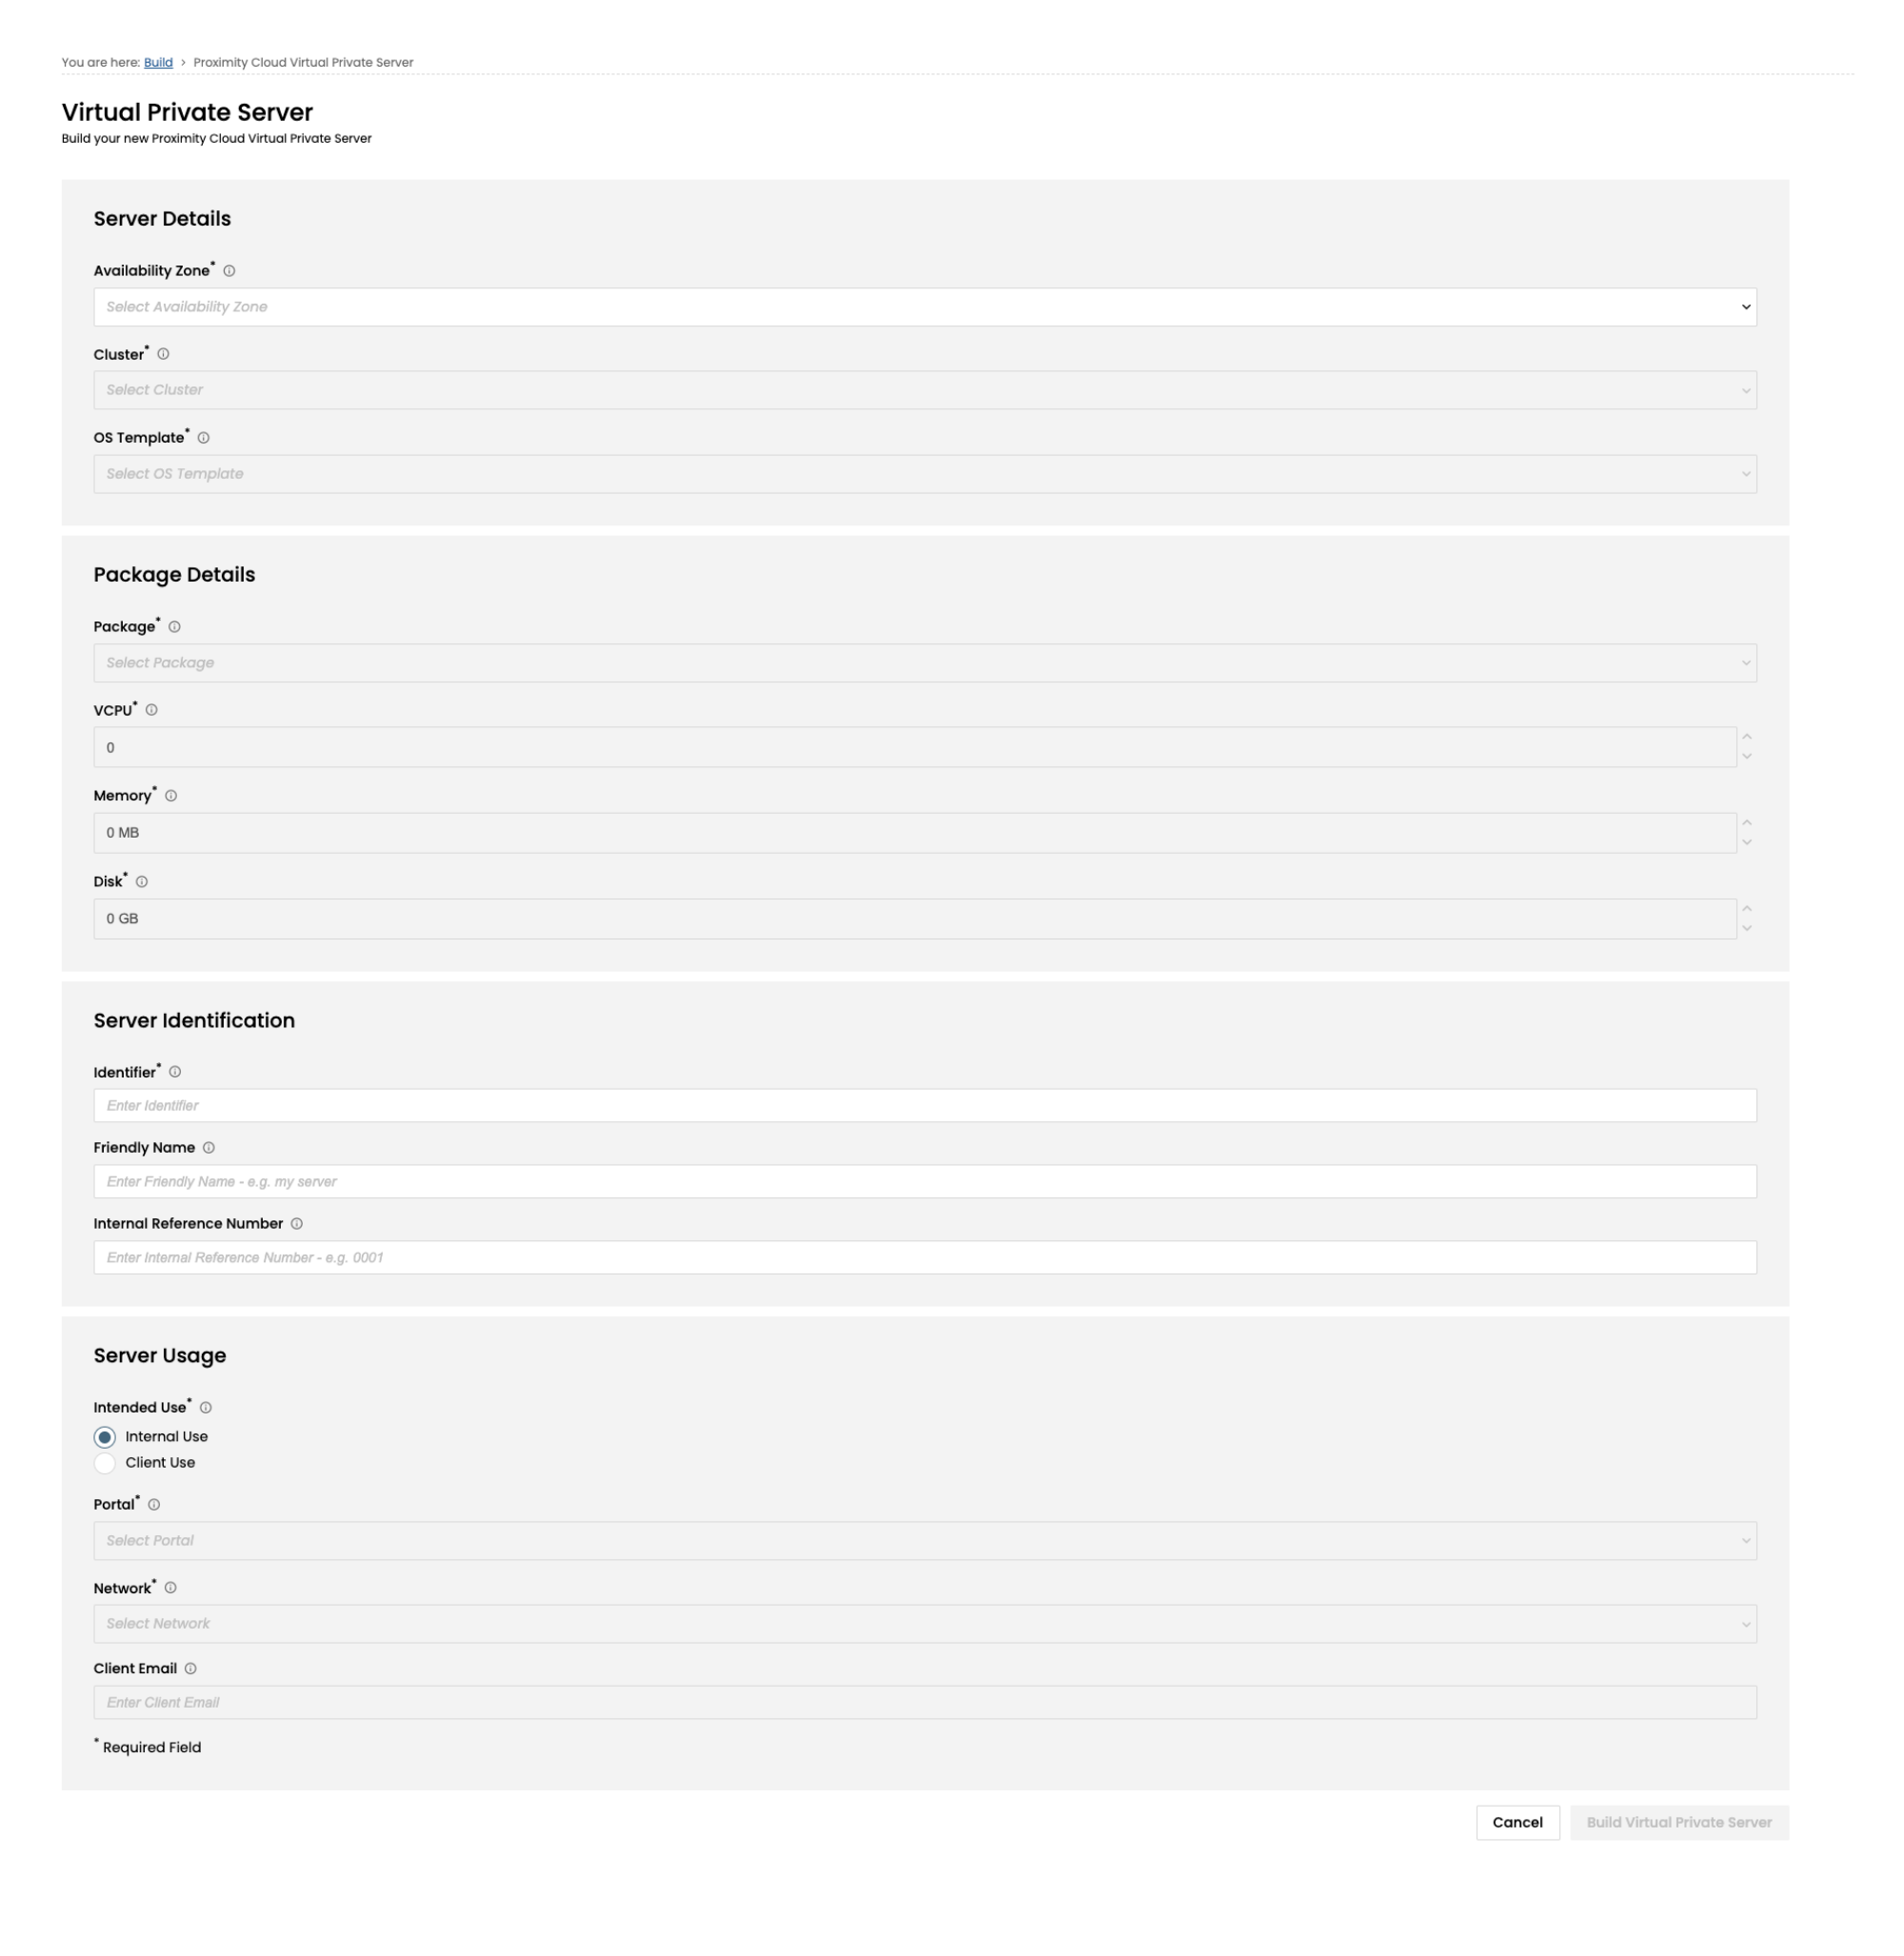
Note that you will need to complete the Availability Zone field in order to get a valid list of options to display in the dropdowns for some of the other fields.
Field Name | Which section of Form | Description |
|---|---|---|
Availability Zone * | Default | Select the Availability Zone in which we will provision your new Virtual Private Server. See Availability Zones for more information. |
Cluster * | Default | Select the Cluster you would like your new Virtual Private Server to be located in |
OS Template * | Default | Select the operating system you would like us to deploy to your new Virtual Private Server. |
Package * | Default | This provides a list of preconfigured packages (e.g. Bronze, Silver, Gold) which are a shorthand for describing the size of VPS which will be provisioned. Choosing one of these packages will autopopulate the vCPU, Memory and Disk fields with the appropriate values. Choose Custom to manually select the specific vCPU, Memory and Disk for your VPS. |
vCPU, Memory (MB) and Disk (GB) * | Default | See above. If Custom is chosen, there will be certain limits placed on these fields to ensure that the VPS settings are large enough to accommodate an Operating System. |
Identifier (previously ‘Client Name’) * | Default | Enter the Client Name that will be associated with your compute item. This can be used to record the usage of the VPS, or to match it to a particular client. |
Internal Use | Additional Information | Select Internal Use or Client Use. |
Friendly Name | Additional Information | Enter an alternative name for your Virtual Private Server that you can use to uniquely identify the server. |
Internal Ref No. | Additional Information | Enter your own internal reference to be used for the newly created compute. This could be an Account Number to keep track of your own client billing for example. |
Intended Use = ‘Client Use’ (the default is ‘Internal’) | Enter an email address of an external client if you would like a Welcome Email to be sent to an external email recipient and to the build requestor. | |
Network * | Under ‘Intended Use’ | See Managing Proximity Cloud Networks below for more information about the choices that are available in the dropdown for this field. |
Portal * | Under ‘Intended Use’ | See Assigning and Releasing Compute from Tenant Portals below for more information about the choices that are available in the dropdown for this field. |
See Selecting Internal Use vs Client Use for more information on choosing the appropriate tab to complete here.
Once you have filled in the build options which you need, select the Build button to start the build of your Virtual Private Server. You will be provided with a reference number to track the request.
When the VPS is ready a notification via email will be sent.
Virtual Private Servers typically take around 15 minutes to build. Build times may vary depending on the overall cluster load.
Note that a threshold check is performed after the VPS request is submitted. If there aren’t sufficient CPU, Memory or Disk resources available in the cluster, you will be notified that the VPS build request has failed. The available resources in the cluster can be viewed on the Cloud Utilisation page (see Cloud Utilisation ).
The provision/virtual-private-server API endpoint provides the capability to provision a VPS using the options outlined here.