The Build form can be triggered from a number of different screens in the portal. The most common way is from the Build screen. See Building Compute - Navigation for details. You will be redirected to a form with customisation options.
Required Fields are indicated with a *.
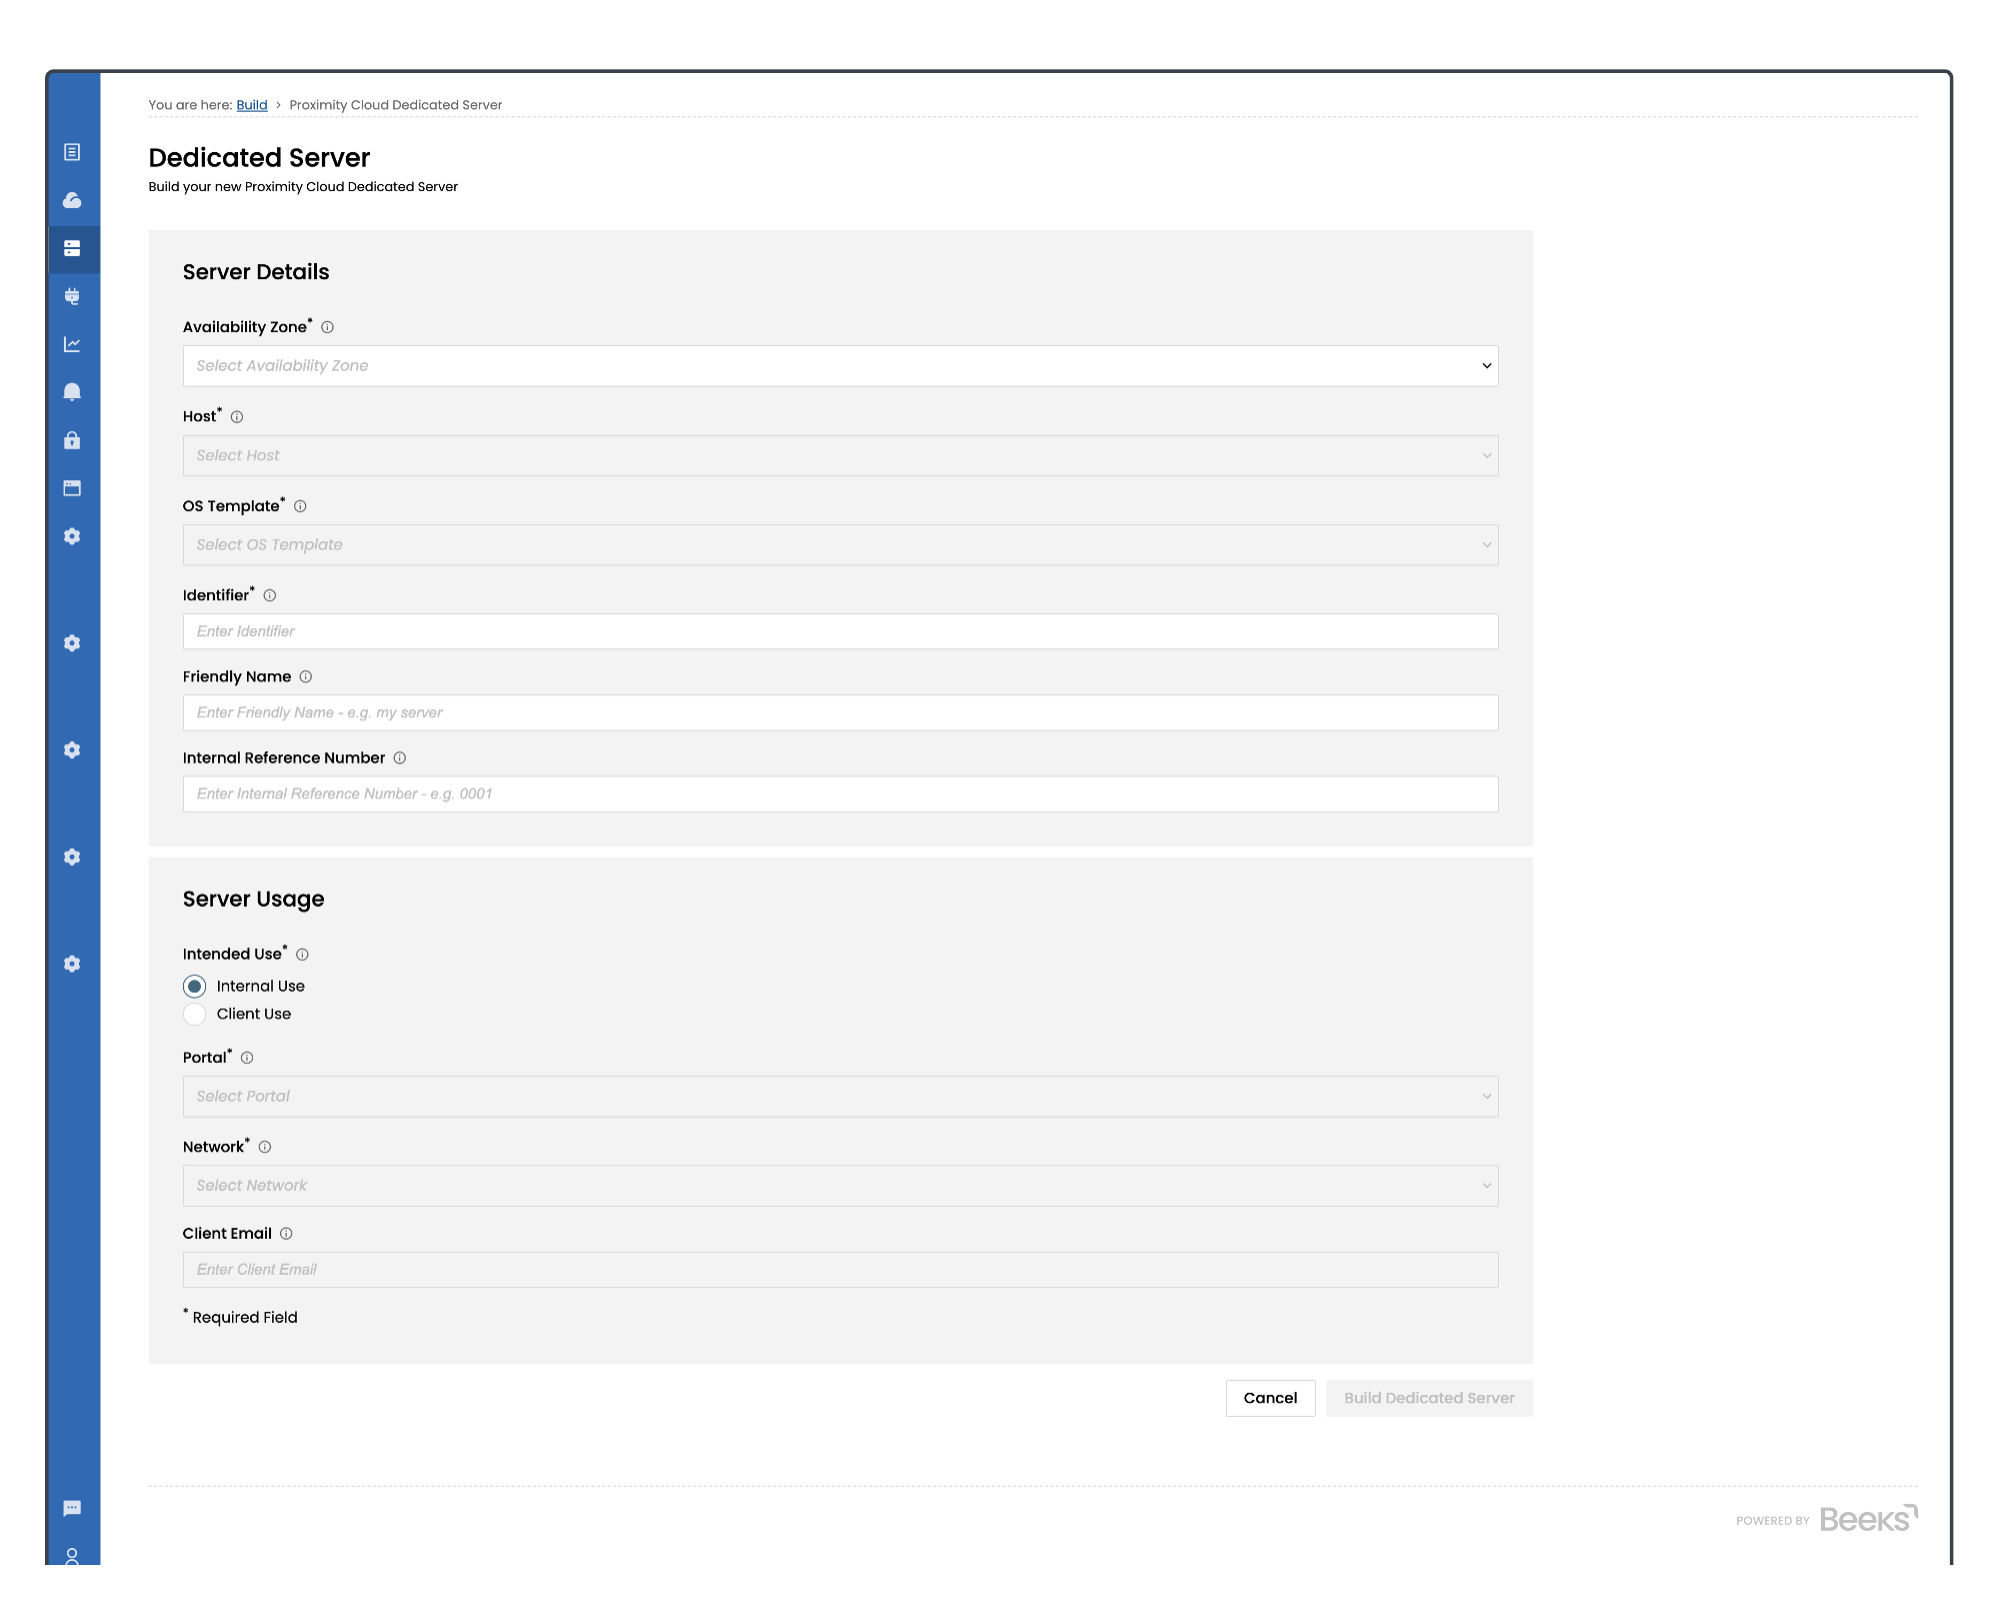
Note that you will need to complete the Availability Zone field in order to get a valid list of options to display in the dropdowns for some of the other fields.
Field Name | Section of form | Description |
|---|---|---|
Availability Zone * | Server Details | Select the Availability Zone in which we will provision your new Dedicated Server. See Availability Zones for more information. |
Host * | Server Details | The physical compute node hardware on which the host will be provisioned. |
OS Template * | Server Details | Select the operating system you would like us to deploy to your new Dedicated Server. |
Identifier (previously ‘Client Name’) * | Server Details | Enter the Client Name that will be associated with your compute item. This can be used to record the usage of the DS, or to match it to a particular client. |
Friendly Name | Server Details | Enter an alternative name for your Dedicated Server that you can use to uniquely identify the server. |
Internal Ref No. | Server Details | Enter your own internal reference to be used for the newly created compute. This could be an Account Number to keep track of your own client billing for example. |
Intended Use | Server Usage | Select Internal Use or Client Use. See the Selecting Internal Use vs Client Use section of this document for further information. |
Intended Use = ‘Client Use’ (the default is ‘Internal’) | Enter the email address of an external client who is not a registered Portal user. This client will receive email notification of any scheduled maintenance or outage reports which may affect this compute resource. | |
Network * | Under ‘Intended Use’ | See Managing Proximity Cloud Networks below for more information about the choices that are available in the dropdown for this field. |
Portal * | Under ‘Intended Use’ | See Assigning and Releasing Compute from Tenant Portals below for more information about the choices that are available in the dropdown for this field. |
Once you have filled in the build options which you need, select the Build Dedicated Server button to start the build of your Dedicated Server. You will be provided with a reference number to track the request.
When the DS is ready a notification via email will be sent.
Dedicated Servers typically take between 45-60 minutes to build. Some builds may take longer where there is a lot of customisation required prior to handover.
The provision/dedicated-server API endpoint provides the capability to provision a DS using the options outlined here.