To provision new compute, select Build from the navigation menu on the left-hand side of your Portal.
This page lists the items you can order: Virtual Private Server (VPS), Dedicated Server (DS) or Cross Connect (CX). Some users may see the option to find out more information about Proximity Cloud.
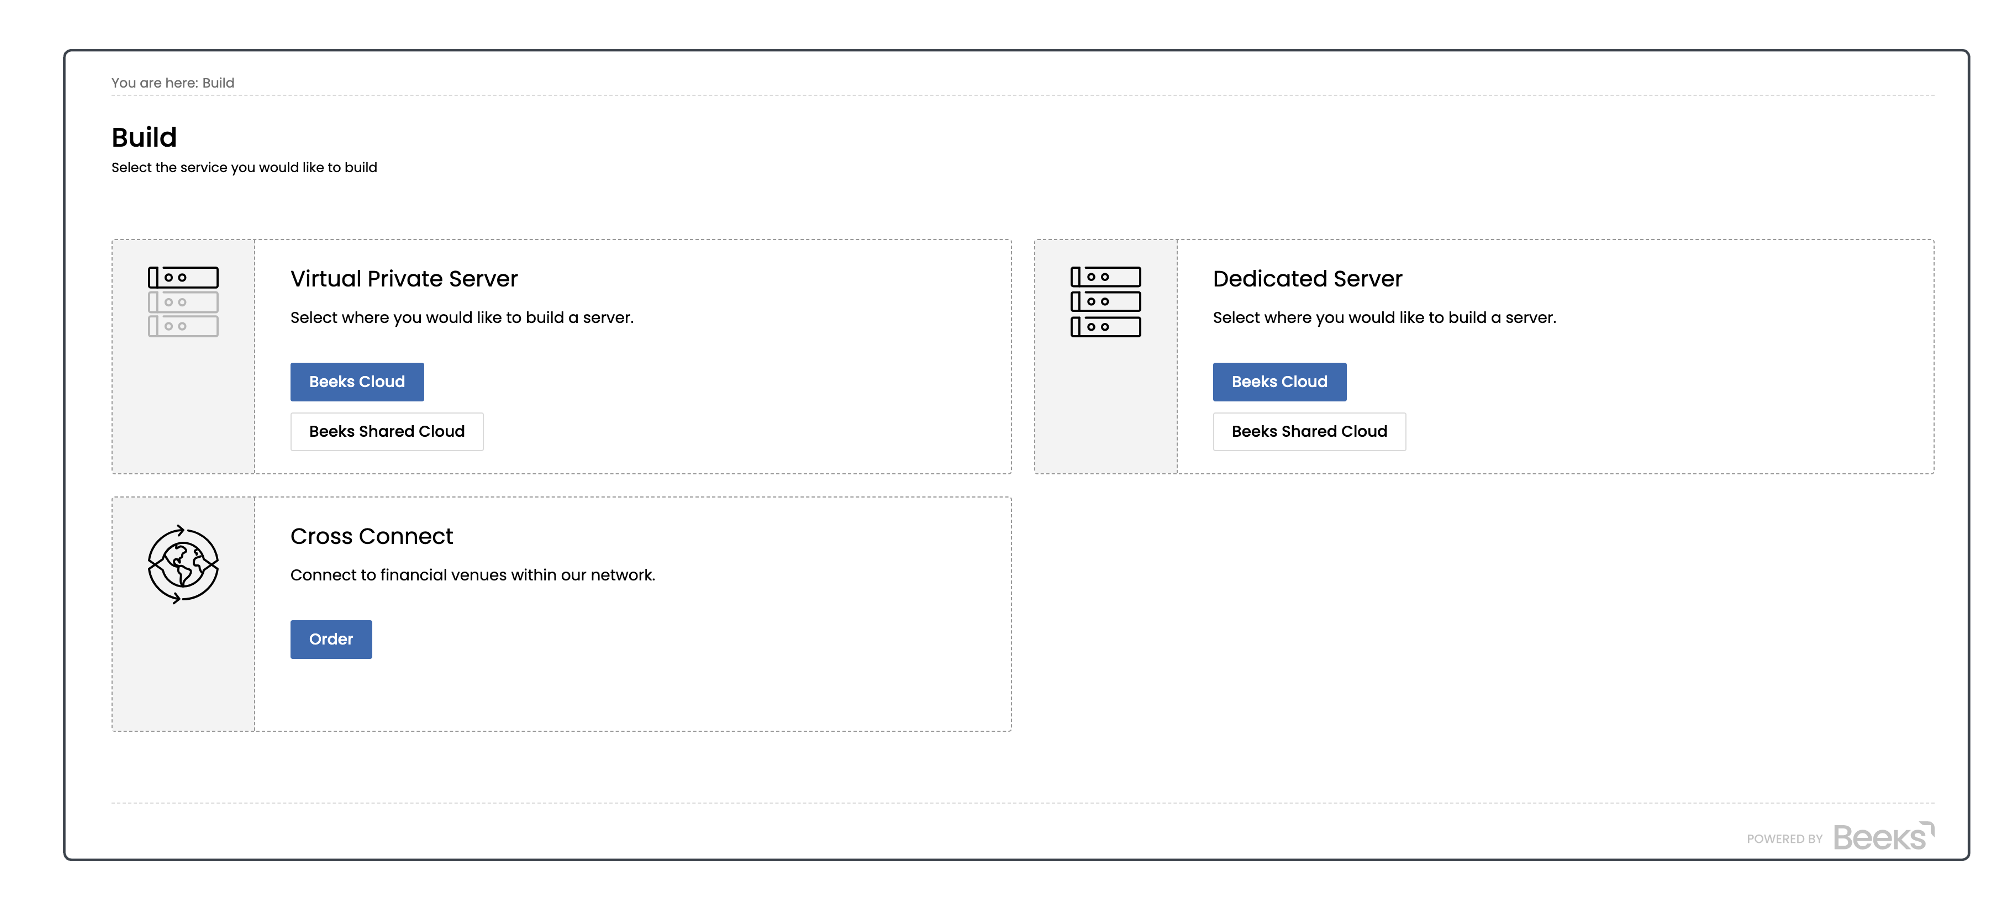
The VPS and DS tiles have a Build button (an Order button for the Cross Connect tile) that you’ll select to order that type of compute.
Some users may not see the options to deploy to certain cloud types, depending on their particular Portal and Availability Zone options.
The provision endpoint provides the functionality to allow you to build new Virtual Private Servers, Dedicated Servers, or Cross Connects. The Proximity Cloud: API Worked Examples guide also includes fuller examples of how each of these API calls can be used to complete common business workflows.
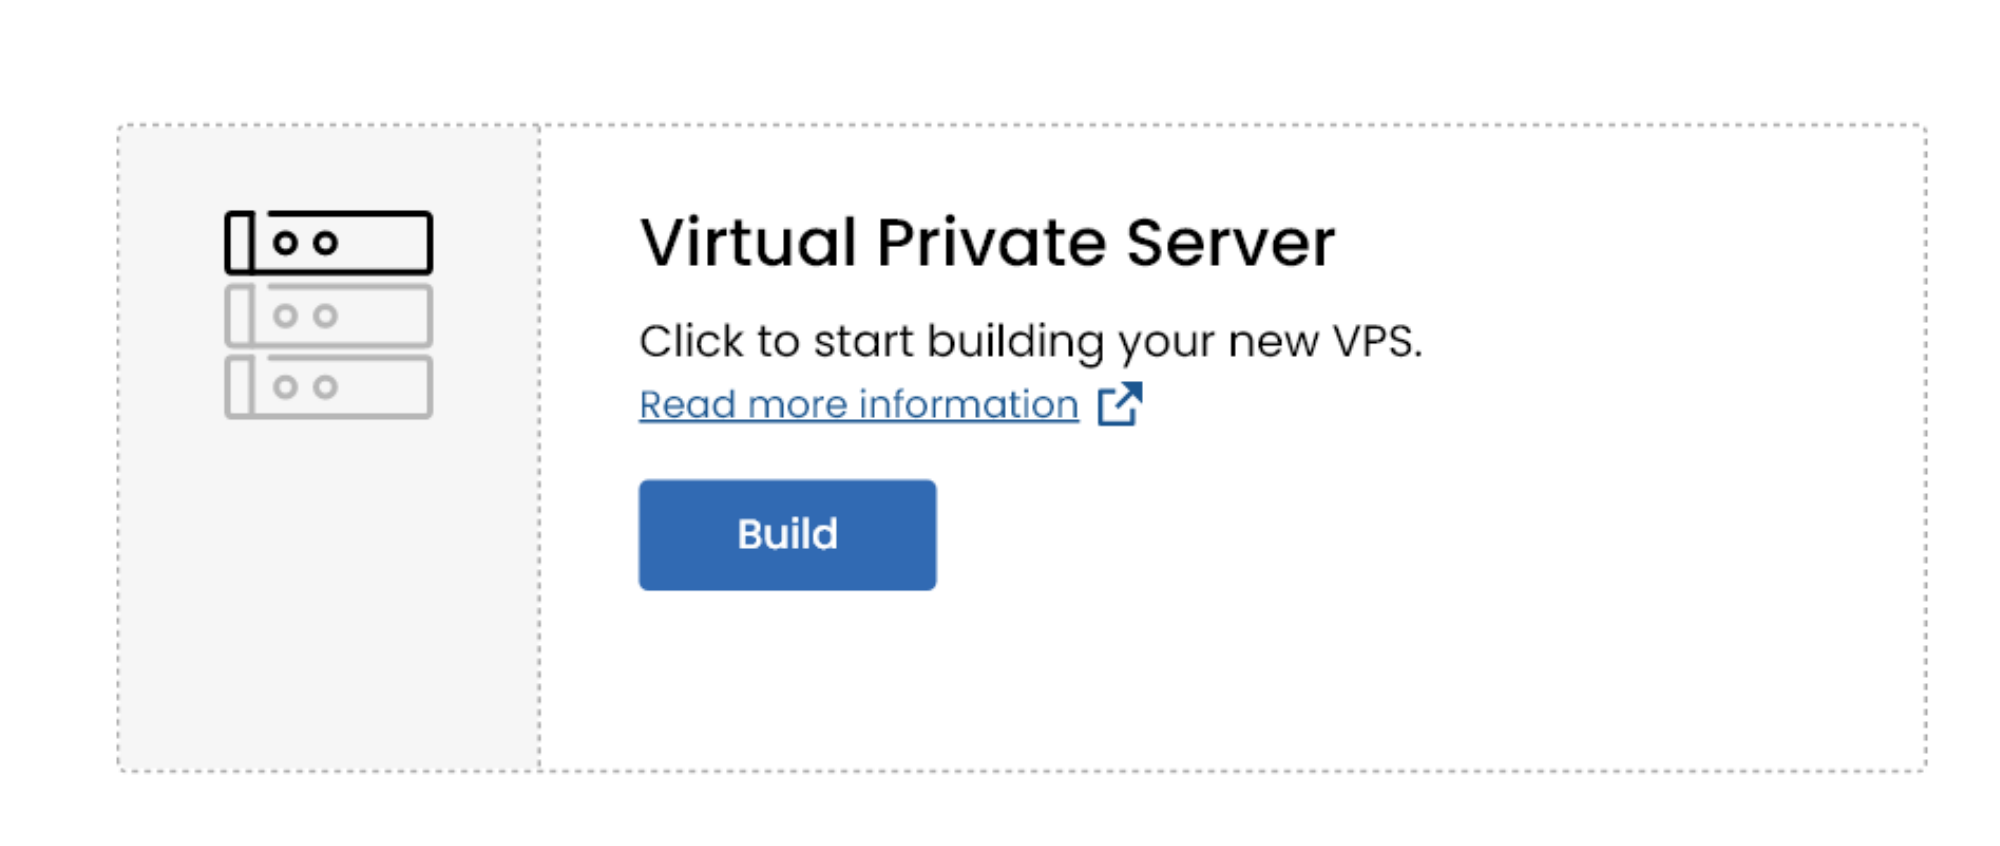
Building a Virtual Private Server
Select Build on the Virtual Private Server tile to open a configuration form.
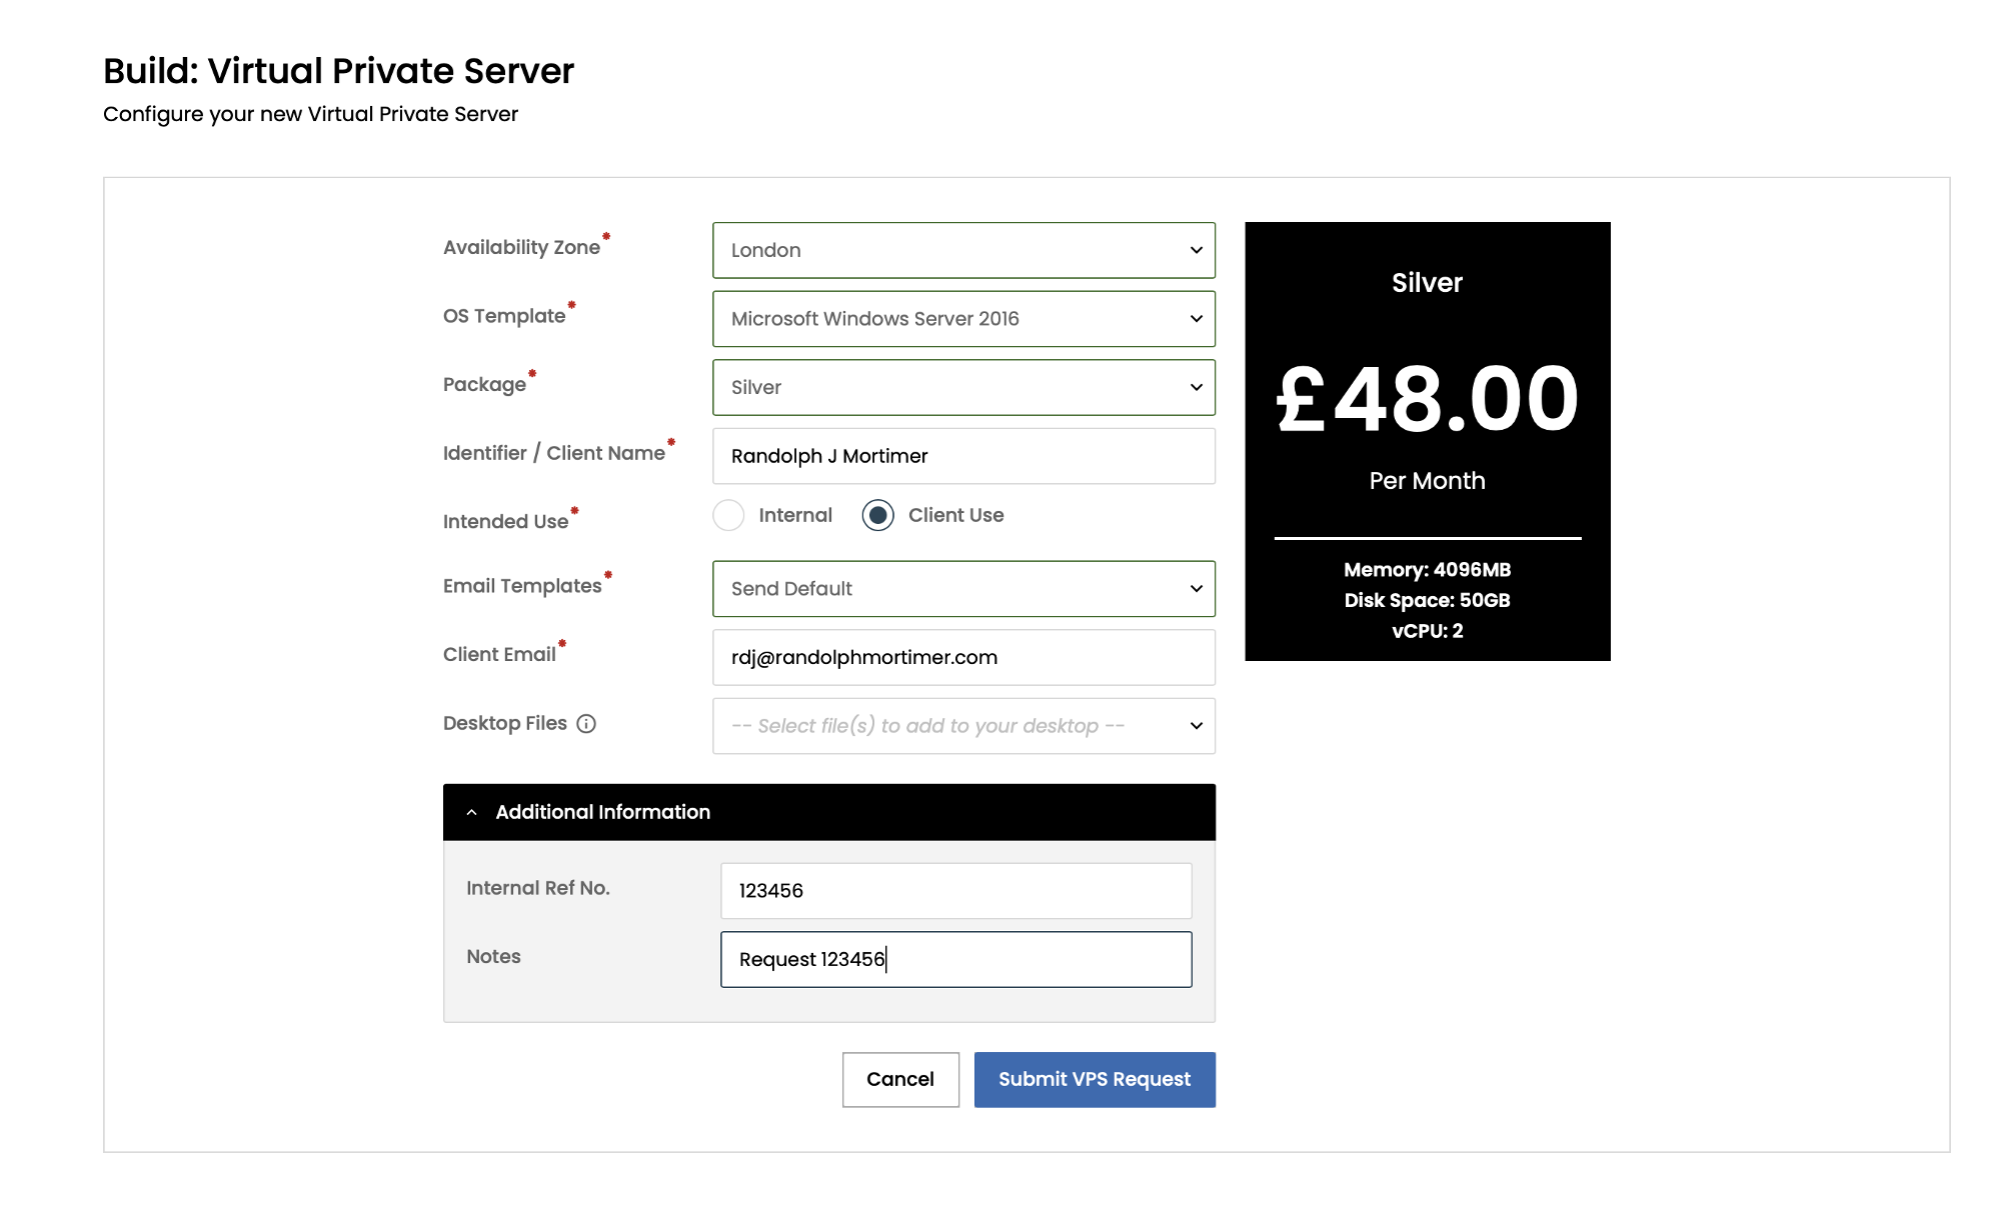
Required Fields are indicated with a *.
Complete the form and submit it to create a new ticket. You will be provided with a reference number to track the request.
When the VPS is ready you’ll receive a notification via email.
Virtual Private Servers typically take around 15 minutes to build. Build times may vary depending on the overall cluster load.
Field Name | Section of the form | Description |
|---|---|---|
Availability Zone * | Default | This field was previously known as Location. Select the Availability Zone for your new Virtual Private Server. An Availability Zone is a collection of Compute Items and associated networking, storage, connectivity etc at a single location. In general, your choice of Availability Zone will be dictated by the geographical requirements of your application. |
OS Template * | Default | This field was previously known as OS. Select the OS Template SKU that will be used to build your new Virtual Private Server. |
Package * | Default | Choose the specification of your new Virtual Private Server by selecting a Gold, Silver, or Bronze package. The price and specification of the selected package will then be shown on a tile on the right hand side. In the context of services that are offered via the portal, a package refers to a predefined set of computing resources and configurations tailored to meet specific performance and capacity needs. |
Identifier/Client Name * | Default | This field was previously known as Client Name. The client name or identifier entered here will be used to create a unique Identifier for your Virtual Private Server. An example of this might be: |
Email Template * | Intended Use = ‘Client Use’ (the default is ‘Internal’) | Select the Don’t Send option if you do not have a requirement for an external client to receive a Welcome email. This client will still receive email notification of any planned scheduled maintenance or outage reports which may affect this compute resource. Select the Send Default option if you would like the Welcome email, including the credentials of the Compute Item, to be sent to an external Customer. |
Client Email * (required if the Send Default option is selected in the Email Template field) | Intended Use = ‘Client Use’ (the default is ‘Internal’) | Optional. Enter the email address of an external client who is not a registered Portal user i.e. a client of yours who you wish to receive credentials for the completed Virtual Private Server. If the field is left blank then the Welcome email will be sent to the build requestor only. The user who submitted the build request is notified by email. All Admins are cc'ed on this email. |
Desktop files | Default | Optional. Select a file from a list, which will then be added to the VPS desktop. The file must be an executable that will be run when a user opens it from the desktop. Raise a support ticket if you need a particular desktop file made available on your Portal for this option. |
Internal Ref No | Additional Information (this section of the form is optional) | Optional. Enter your own internal reference to be used for the newly created compute. This could be an Account Number to keep track of your own client billing for example. |
Notes | Additional Information (this section of the form is optional) | Optional. This is a text field for adding any further information that is pertinent to your build request. |
Selecting Internal Use versus Client Use
The Intended use section asks you to select Internal or Client use. This enables us to identify whether we'll send the Welcome email to the list of internal email addresses we already have for you and your team, or whether you’ll need to provide a new email address to the Portal, e.g., that of your client.
Internal
This is the default. Select Internal if the VPS is for users in your organisation. The Welcome email for the VPS will be sent to your internal contact list only.Client use
Select Client use if the VPS is for your client, and they do not have access to a Portal for their institution. The Welcome email for the VPS will be sent to the email addresses you’ll provide here, which are external users that don’t have Portal accounts.
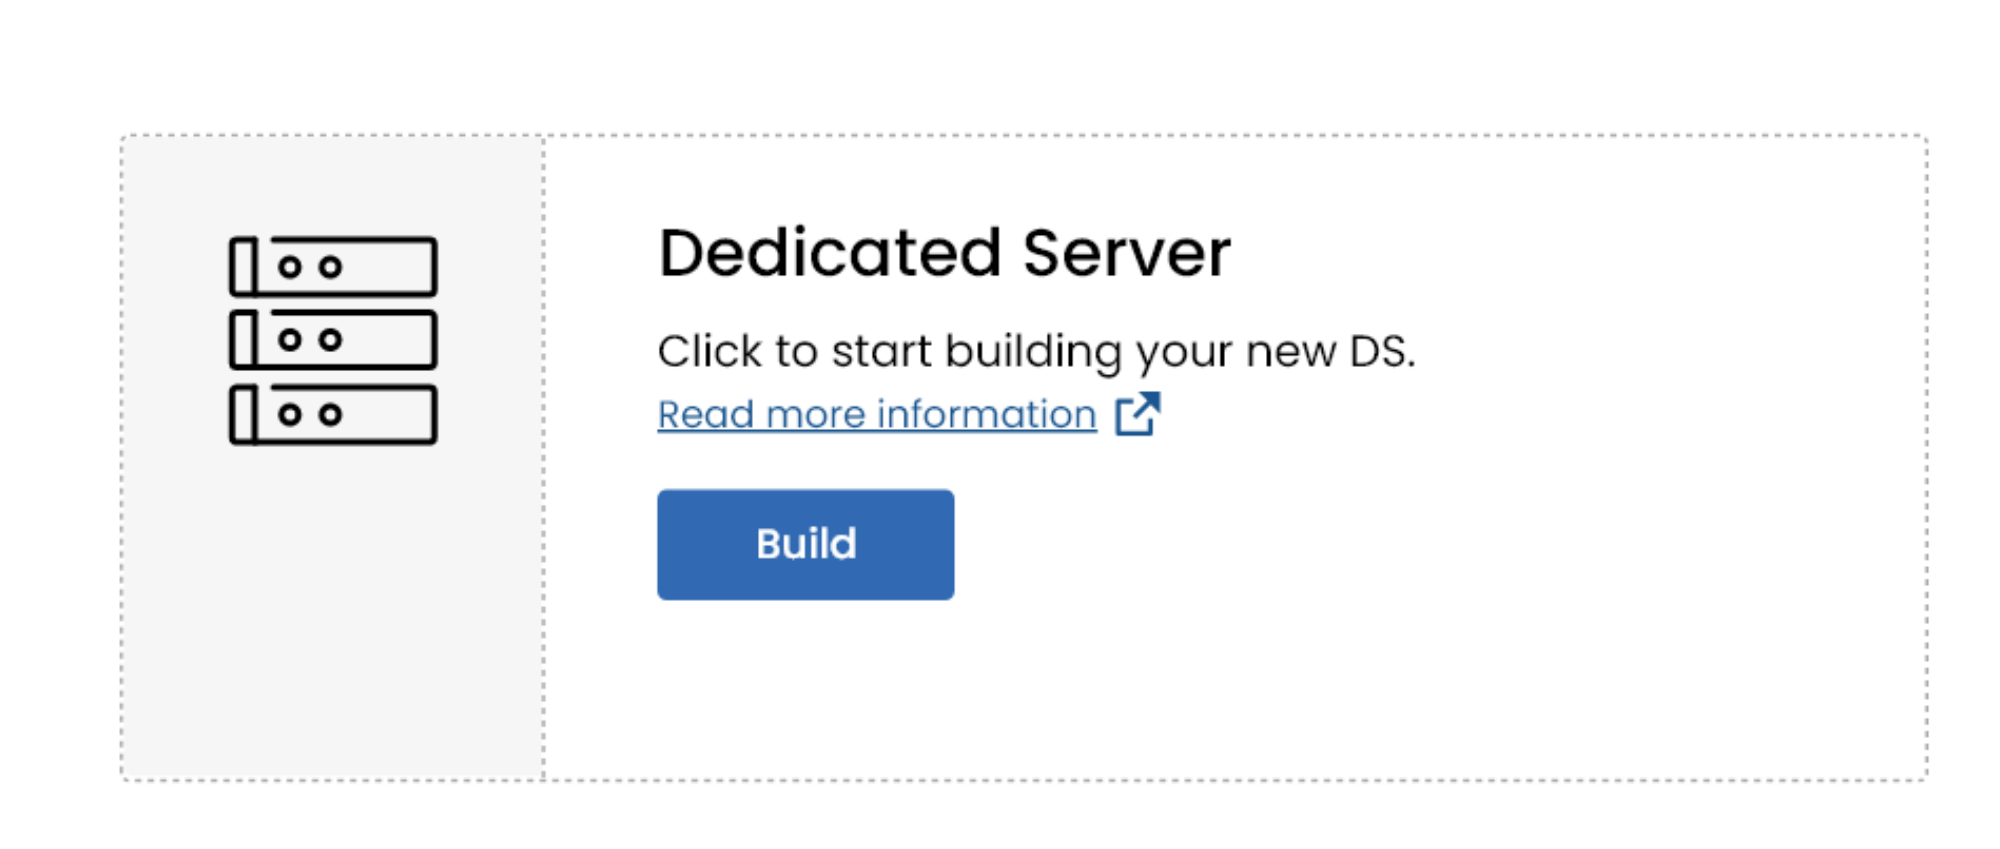
Building a Dedicated Server
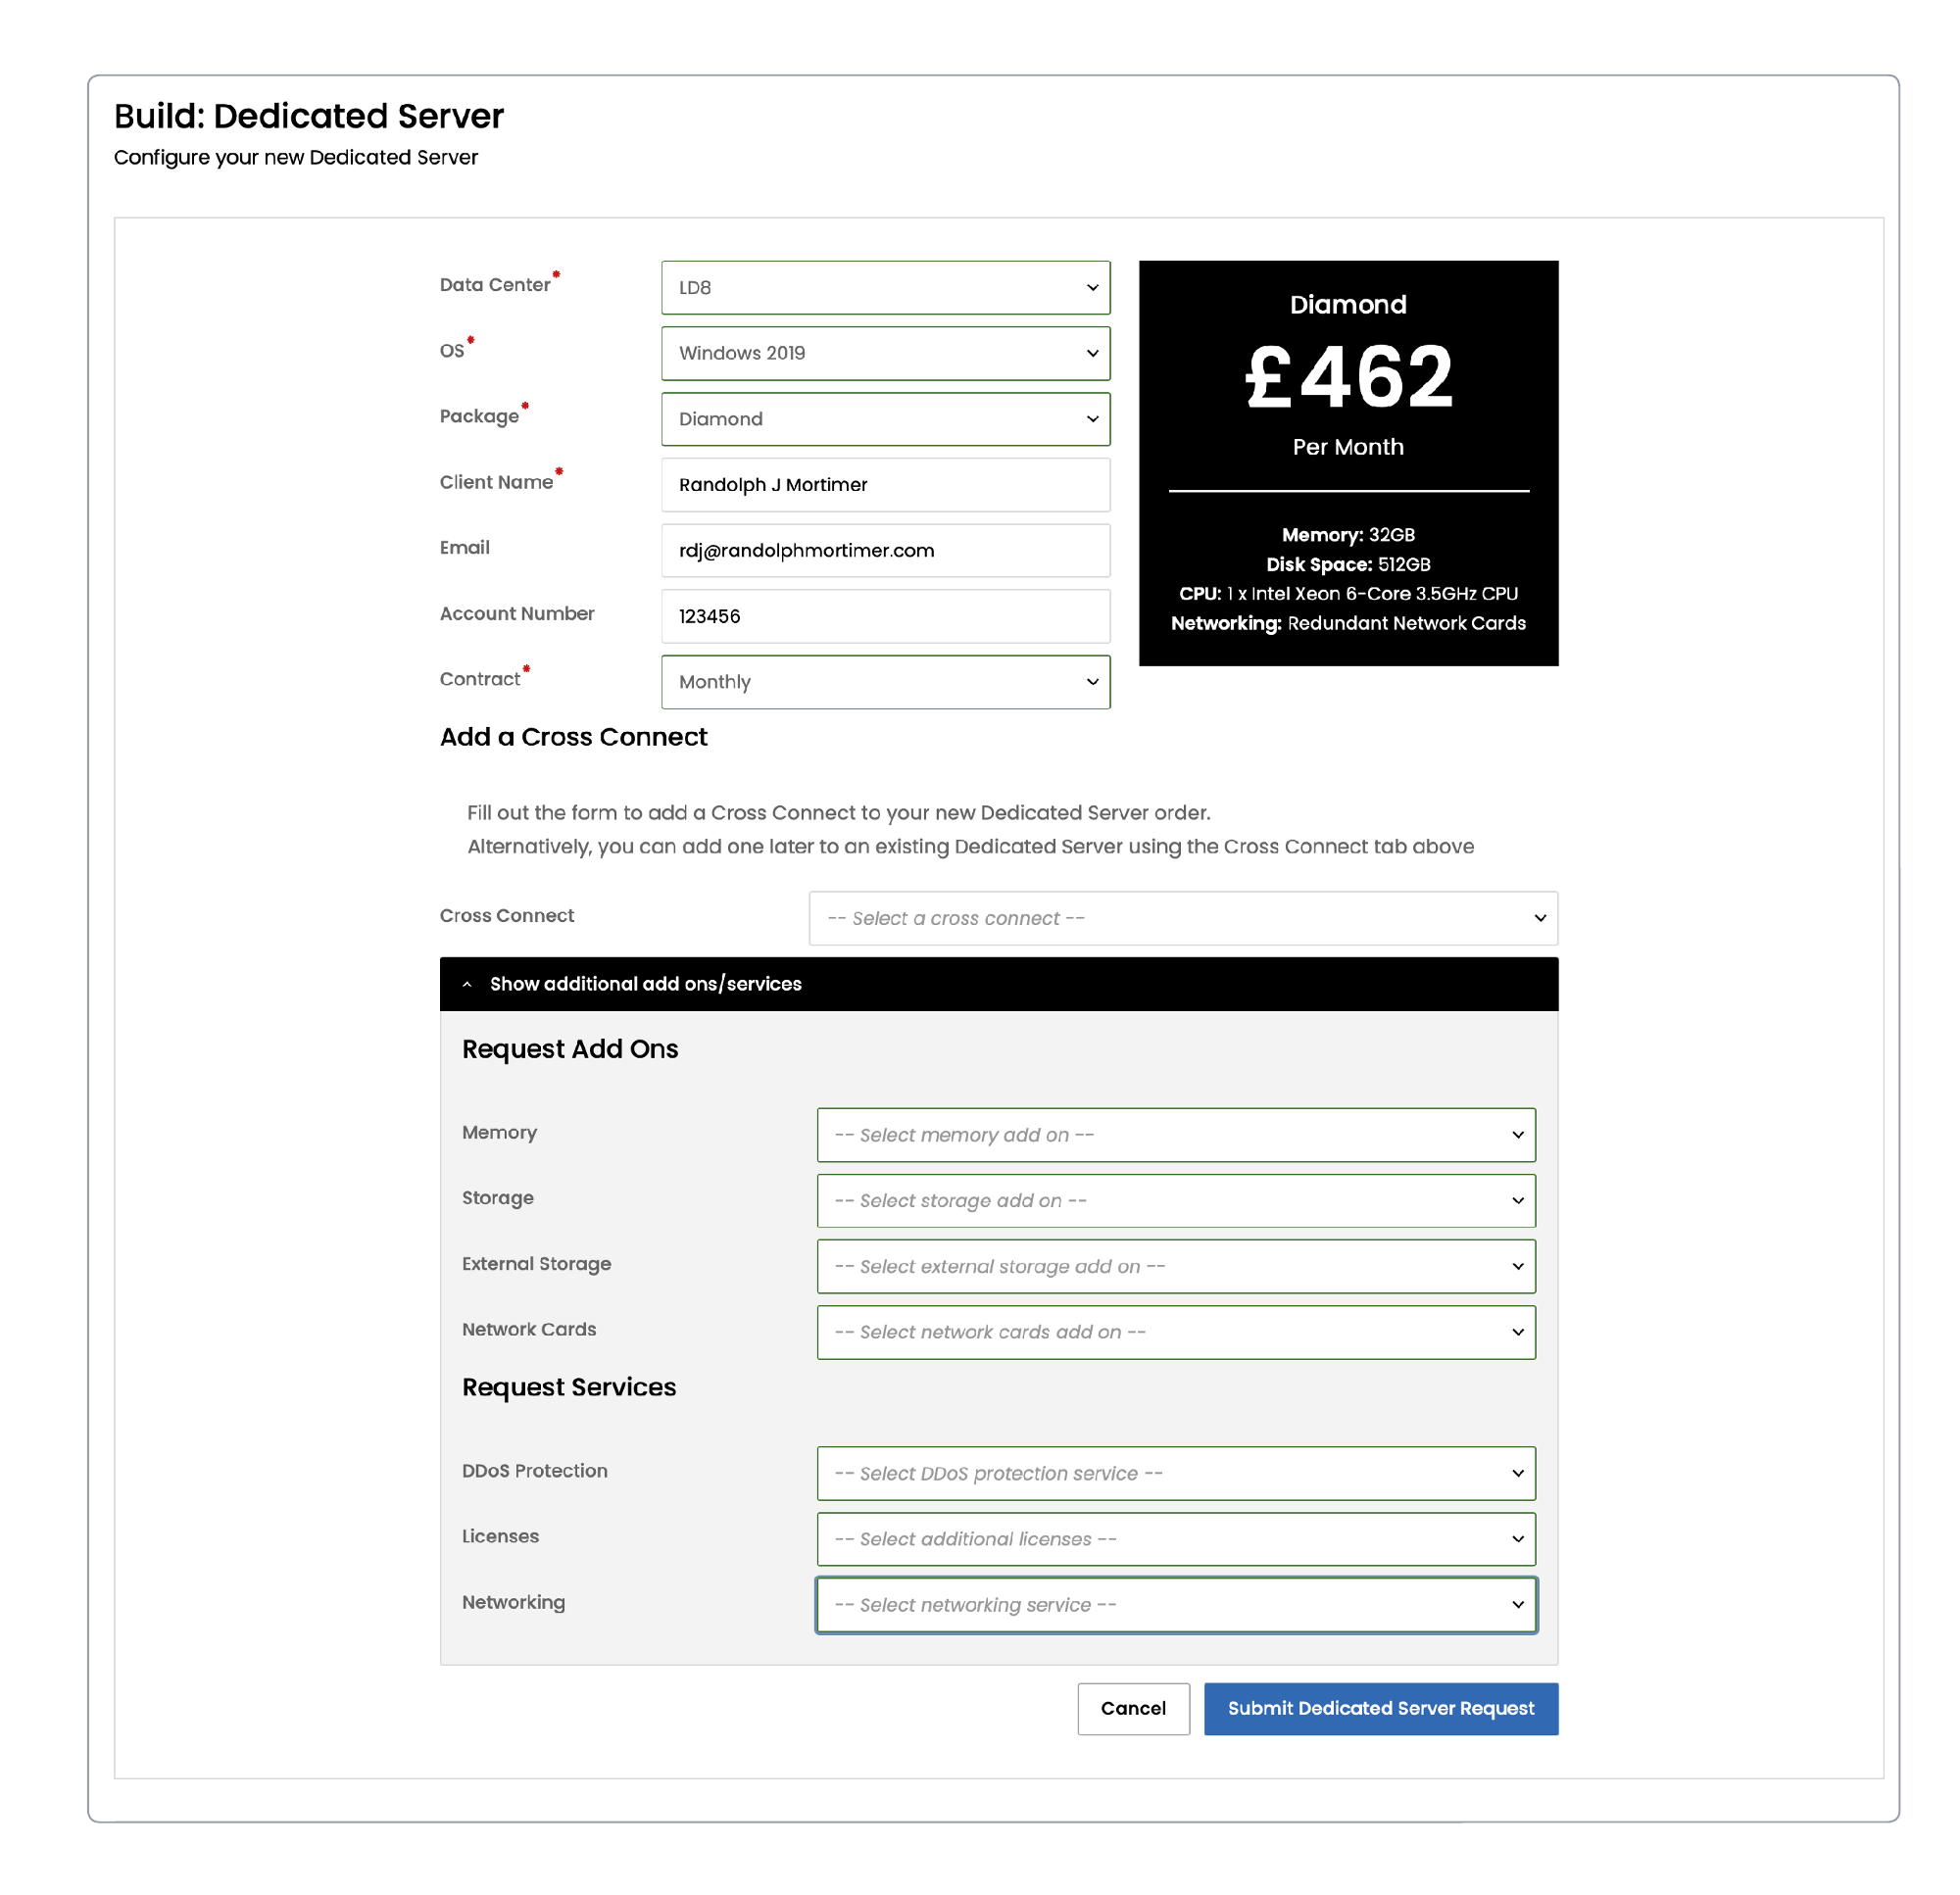
Select Build on the Dedicated Server tile to open a configuration form.
Required Fields are indicated with a *.
Complete the form and submit it to create a new ticket. You will be provided with a reference number to track the request.
When the DS is ready you’ll receive a notification via email.
Field Name | Description |
|---|---|
Data Center * | Select the data centre region in which we will provision your new Dedicated Server. |
OS * | Select the operating system you would like us to deploy to your new Dedicated Server. |
Package * | Choose the specification of your new Dedicated Server by selecting a Tier within a Platinum, Hermes, Titan package, or by selecting a Ruby or Emerald or Diamond package. |
Client Name * | Enter the Client Name that will be associated with your Compute Item. |
Enter the email address of an external client who is not a registered Portal user. This client will receive email notification of any scheduled maintenance or outage reports which may affect this compute resource. | |
Account Number | Assign your own internal reference to the newly created compute. E.g., to keep track of your own client billing. |
Contract * | Allows you to opt to pay annually rather than monthly. |
You have the option to add a Cross Connect now or you can wait until your Dedicated Server order is complete and then select Order on the Cross Connect tile to order the Cross Connect.
Dedicated Servers typically take between 45-60 minutes to build. Some builds may take longer where there is a lot of customisation required prior to handover.
Customising the Build of your Dedicated Server
You can choose to increase the base spec of your chosen package by selecting Show additional add ons/services.
Add Ons
Each Add on option usually requires a manual upgrade of equipment. Please note that this can delay fulfilment of your order by up to 14 days depending on the availability of components.
Services
Each service can usually be provided within 1-2 days of making your order.
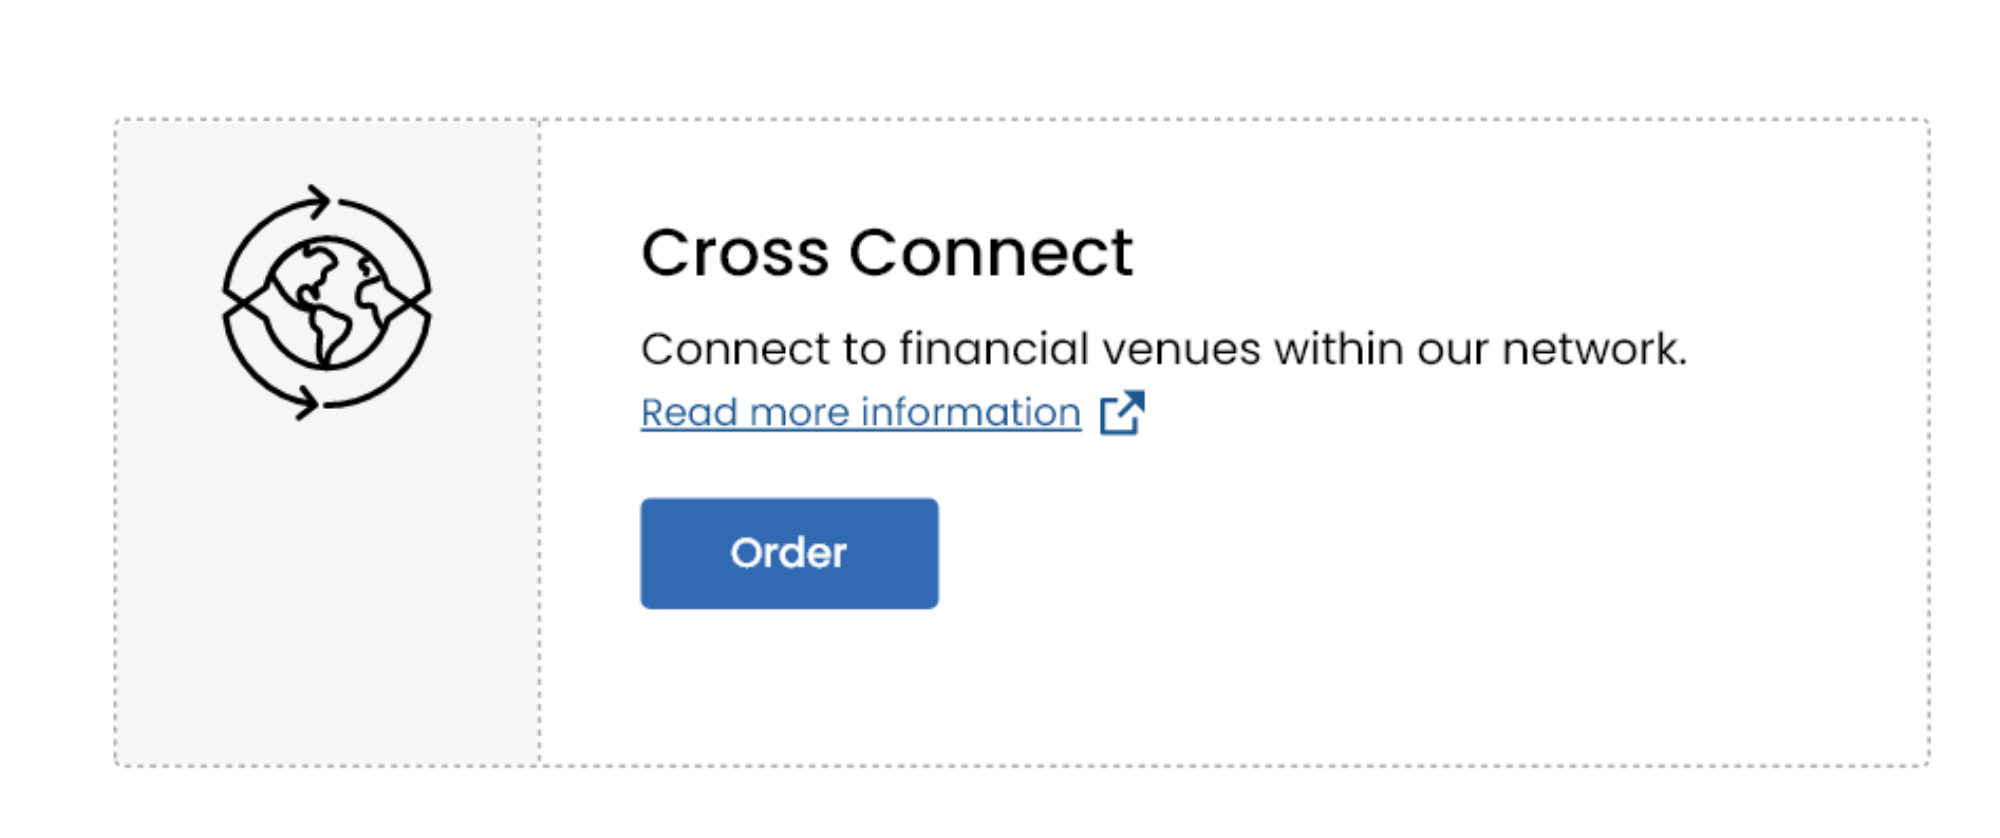
Building a Cross Connect
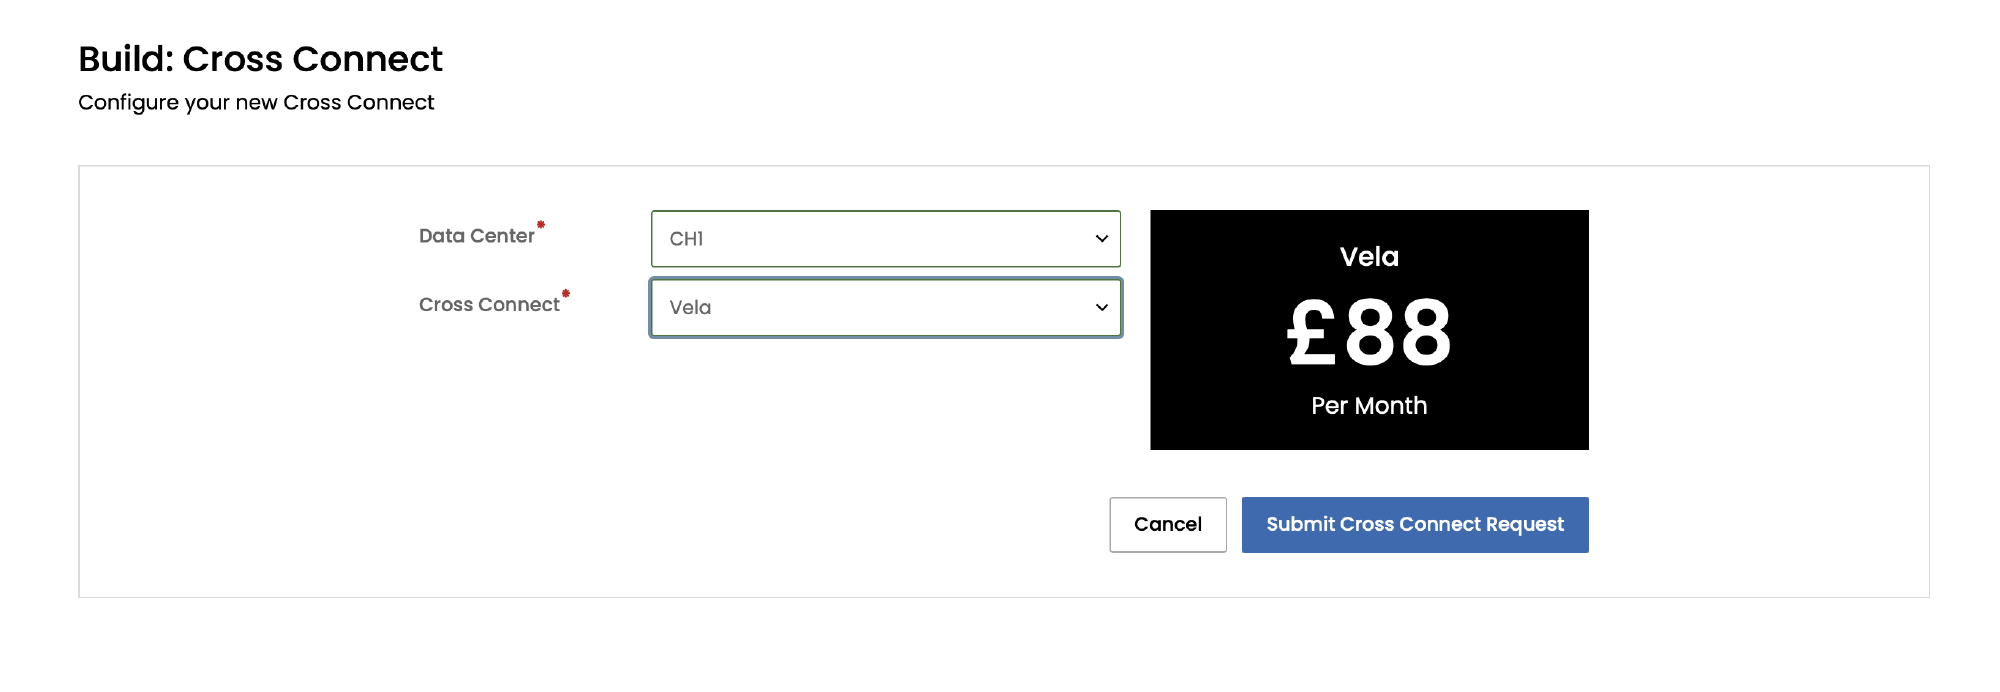
Select Order on the Cross Connect tile and you will be redirected to a form with customisation options.
Complete the form and submit it to create a new ticket. Required Fields are indicated with a *.
You can view the ticket in the Support page of the Portal. When the CX is ready, the ticket will be updated and you’ll receive a notification via email.
Cross Connects typically take 24-48 hours to build, depending on requirement.
Field Name | Description |
|---|---|
Data Center * | Select the data centre region in which we will provision your new Cross Connect. |
Cross Connect * | Select a Cross Connect from the list. The list contains the Cross Connects that are available for the selected data center. Once you’ve selected a Cross Connect, the package details for that Cross Connect are displayed. |